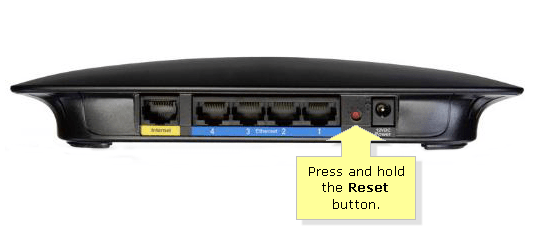
Media Prioritization for Linksys wifi routers


Linksys wifi router devices will allow you to make some advance settings very easily but for that you will install to create Linksys smart wifi account from your device. Linksys smart wifi account can be created using http //myrouter.local from your device.

192.168.0.1 login

Once you have Linksys smart wifi account, you can make all kind of settings of your device from a computer or mobile device. One such advance setting is making Media Prioritization settings for your devices. Using these simple settings you can easily make bandwidth settings for all wireless devices that are connected to your wifi access.

Steps to Configure Priorities for Wireless Devices Connected to your Linksys Router

  1. Access Linksys smart wifi account from a computer device.
  2. Fill http //myrouter.local in address bar and then type Linksys login user name and password in the given fields. Here is the complete explanation of the network map tool.
  3. Select “Smart WiFi Tools” from your device and then click on “Media Prioritization” button.
  4. ON these media prioritization for your Linksys routers.
  5. Using your mobile device you can shift the devices to high priority tab. You will get a list of the devices that are connected to your wifi access.
  6. Once you move all these devices, you can click on “OK” button.

KB21872-001_EN_v4a (1)

These are simple steps that each Linksys user can easily follow so that they can make the media prioritization settings for wireless devices. If these settings giving your some kind of problems then it will better that you can contact Linksys support team for help.


Technical Specifications for Linksys EA7300 MAX-STREAM Router

using Linksys EA7300 MAX-STREAM Router device for your home wifi needs is best to use when you can know about the technical specifications of your this devices. From other articles of this website you can easily get all advance features and details about Linksys EA7300 MAX-STREAM Router. In this article we are going to explain technical specifications about these routers. Using myrouterlocal we address you can setup your device easily.

KB21872-001_EN_v4a (1)


Here are the Technical Specifications for Linksys EA7300 MAX-STREAM Router


  1. There is 1 WAN port in this router device.
  2. 4 LAN ports are also provided with Linksys EA7300 MAX-STREAM Router. You can connect any LAN device to your router using these ports. From this blog, you can easily remove the gateway error for the tplink type of devices.


  1. There is one 3.0 USB port that you will find at the back side of these routers. When you need to connect any USB device to your router, these ports will help you in this.
  2. Power button is used to switch ON or OFF the power supply for your router device.
  3. Internet LED is used so that you can know about internet status of your device. if your internet connections are working accurately then this status LED will be solid green in color.
  4. Dual core processor is provided with these router devices and this processor will help you to get high speed wifi connections.
  5. Using myrouterlocal web page you can easily configure your device from your computer. Using Linksys smart wifi account you can setup your device from any remote location.
  6. WPS status LED will be used when you configure your device using WiFi protected setup. This WPS status LED will blink in very fast speed when WPS settings are going on for your router.


These are the features that you can find with advance Linksys EA7300 MAX-STREAM Router devices.


dlink router channel settings

When you configure your dlink wifi router device, you will need to get some advance settings for your this device. Using 192.168 o 1.1 admin password settings, you can easily secure your device and then you can get full security for your device. In this article, we will explain steps for handing channel settings for your dlink device. If you want to change password settings for your device then you can go for other blogs that we have explained. Look for the way for managing the advanced settings for the Netgear EX7000 device easily.

192.168 o 1.1 admin username and password

How to Handle Channel Settings for your Dlink Device

  1. Provide power supply to your dlink wifi extender device.
  2. After that have a look at the power LED for your device and this status LED must be solid green in colour.
  3. After that connect your computer device to the wifi access that your dlink wifi extender device is providing. You will need to search for the SSID that your device is providing.
  4. Access http:// dlinkap.local web address from same computer device and go for the login page.

192.168 point 0.1

  1. After that fill dlink login user name and password for your device access.
  2. Go for “Setup” option
  3. After that you can choose “Internet” option from left side menu from your screen.
  4. After that you can click on “Manual Wireless Network Setup” option from the last of your screen.
  5. First enable the wireless access for your dlink device.
  6. After that you can change the SSID name for your dlink device. Your device will broadcast this SSID to other wireless devices that are installed to your network.
  7. You can enable both 2.4 GHz or 5 GHz networks for your home network.
  8. Click on “Save” button and save the channel settings for your dlink wifi router device.